New to making pickles? This step-by-step guide on how to can pickles is a great place to start. We’ve rounded up our best pickle canning tips and tricks. Ready, set, can!
Things to Know Before You Start Pickling
So, how are pickles made? Before you get started, there are a few important basics to learn. Follow them for the best results—and be sure not to make any of these common pickling mistakes.
1. Choose the right vinegar
When it comes to pickling recipes, use white vinegar for a little more sharpness. If you’re going for a milder flavor, use cider vinegar. For extra-crunchy pickles, grab 10%-strength vinegar.
2. Know your cucumber
What kind of cucumbers are the best for making pickles? Cukes labeled as canning or pickling cucumbers are a shoo-in, but you can use traditional ones, too. It’s best to choose a cucumber with a thicker skin.
You can use organic or regular cucumbers, but the key is to buy cucumbers without the shiny wax coating that supermarkets use. The wax is edible, but it’ll change the texture of your pickles.
3. Don’t use table salt
While it might be tempting to use table salt because you already have it at home, make sure you secure canning salt before you get started. What’s the difference between canning salt and table salt? Canning salt is extra fine and doesn’t contain caking agents or additives like iodine. If you don’t have canning salt on hand (also called pickling salt), kosher salt works, too. Here’s more on the different types of salt.
4. Sterilize your jar
Here’s how to sterilize: Wash the jars and caps in hot, soapy water and rinse thoroughly. Dry the bands on a towel. Put the jars in a large kettle with enough water to cover them by at least 2 inches, then boil for 10 minutes to sterilize. Turn off the heat, but leave the jars in the water until they’re ready to be filled.
For the lids, place them in a separate small saucepan and cover them with water. Bring the water to 180°F and simmer for 10 minutes. Remove the lids from the heat until you’re ready to start canning.
How to Can Pickles
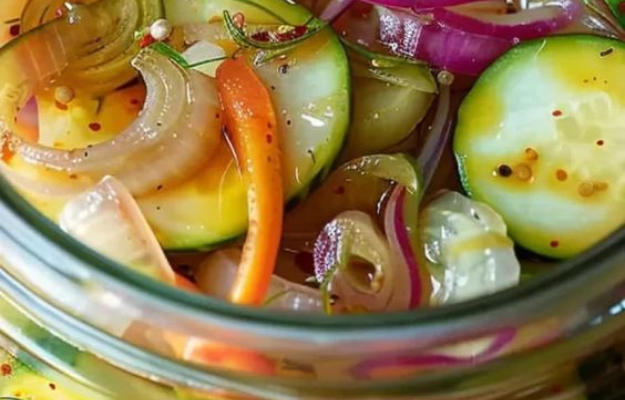
Gather the following canning supplies and get started learning how to can pickles! We’re using this recipe for the best ever sweet pickles.
Tools you’ll need
- Large nonreactive bowl
- Dutch oven
- 4 wide-mouth, 1-pint jars with lids
- Steam canner
Ingredients
- 9 cups sliced pickling cucumbers
- 1 large sweet onion, halved and thinly sliced
- 1/4 cup canning salt
- 1 cup sugar
- 1 cup water
- 1 cup white vinegar
- 1/2 cup cider vinegar
- 2 tablespoons mustard seed
- 1 teaspoon celery seed
- 1/2 teaspoon whole peppercorns
- 4 bay leaves
- 12 garlic cloves, crushed
- Crushed ice
Directions
Step 1: Soak the cucumbers

In a large, nonreactive bowl, combine the cucumbers, onion and salt. Cover with crushed ice and mix well. Let stand 3 hours. Drain; rinse and drain thoroughly.
Step 2: Make the vinegar mixture and add the cucumbers

In a Dutch oven, combine sugar, water, vinegars, mustard seed, celery seed and peppercorns. Bring to a boil, stirring to dissolve the sugar. Add the cucumber mixture; return to a boil, stirring occasionally. Reduce heat and simmer, uncovered, 4-5 minutes or until heated through.
Step 3: Fill the jars

Carefully ladle the hot mixture into four hot wide-mouth 1-pint jars, leaving 1/2-inch headspace. Add 3 garlic cloves and 1 bay leaf to each jar. Remove air bubbles and, if necessary, adjust the headspace by adding hot pickling liquid. Wipe rims. Center the lids on the jars and screw on the bands until they’re fingertip tight.
Editor’s Tip: Canning lids are designed for one-time use, so don’t use lids that you’ve used to can previously.
Step 3: Can, can, can!

Place the jars into a steam canner with simmering water. Bring to a boil; process for 10 minutes. Remove jars and cool.
Tips for Canning Pickles

How can you tell if the canning seal has formed properly?
You can tell that your jar of pickles was properly sealed by checking for a couple indicators. First, check the lid: It should have a slight concave shape because of the vacuum that was created during canning. If there’s no slight concave shape, it’s not sealed.
Second, if you press down in the center of the lid and it doesn’t give, it’s sealed properly. If you press down and it pops or springs up, the jar of pickles isn’t sealed. You can always process your jar of soon-to-be pickles again if the can didn’t seal properly—so don’t sweat it if it didn’t work the first time.
How long will pickles last?
Before you break the seal and dig into the pickles, you can keep the jar of unopened canned pickles for up to a year. Once you open the jar of pickles, keep them in the fridge for up to a month.
How can you tell if pickles have gone bad?
While canning drastically extends the lifetime of pickles, they still won’t last forever. Better to play it safe rather than sorry by checking for the following signs that they’re no longer edible:
- Before cracking open a jar, look for a bulging lid, a change in color in the pickles, or a change in opacity of the brine. If the brine was clear before and it’s cloudy now, toss the pickles.
- Once you open it, look out for a white film or foam at the top of the jar, any mold growth or any unexpected smells.
Can you use jars in different sizes to can pickles?
The processing time depends on the size of the jar. Most recipes call for either 10 or 15 minutes. The bigger the jar, the longer the processing time. If you want to follow this recipe exactly, use 1-pint jars. If you want bigger or smaller portions, and you’re a first time canner, pick another pickling recipe with the exact size you’re looking to make.


